1. Decide on what type of hat you want to create. (use images on the net or look around your house for inspiration).
2. Take your scissors and cut your hat to the desired height. (the bottom of your cup will become the top of your hat).
3. Paint your hat using the acrylic paint. After the paint is dry add any details your hat may need.
4. Depending on what type of hat you are making shape and cut out a piece of cardboard/ card stock paper. This will be the brim of your hat. (the compass works well for this step).
5. Paint and add details to the paper.
6. Next glue the pieces together.
7. Add any other details your hat may need. Examples: feathers, logos, fake jewels, etc.
----------------------------------------
HOW THE HATS IN THE PHOTOS WERE MADE
----------------------------------------
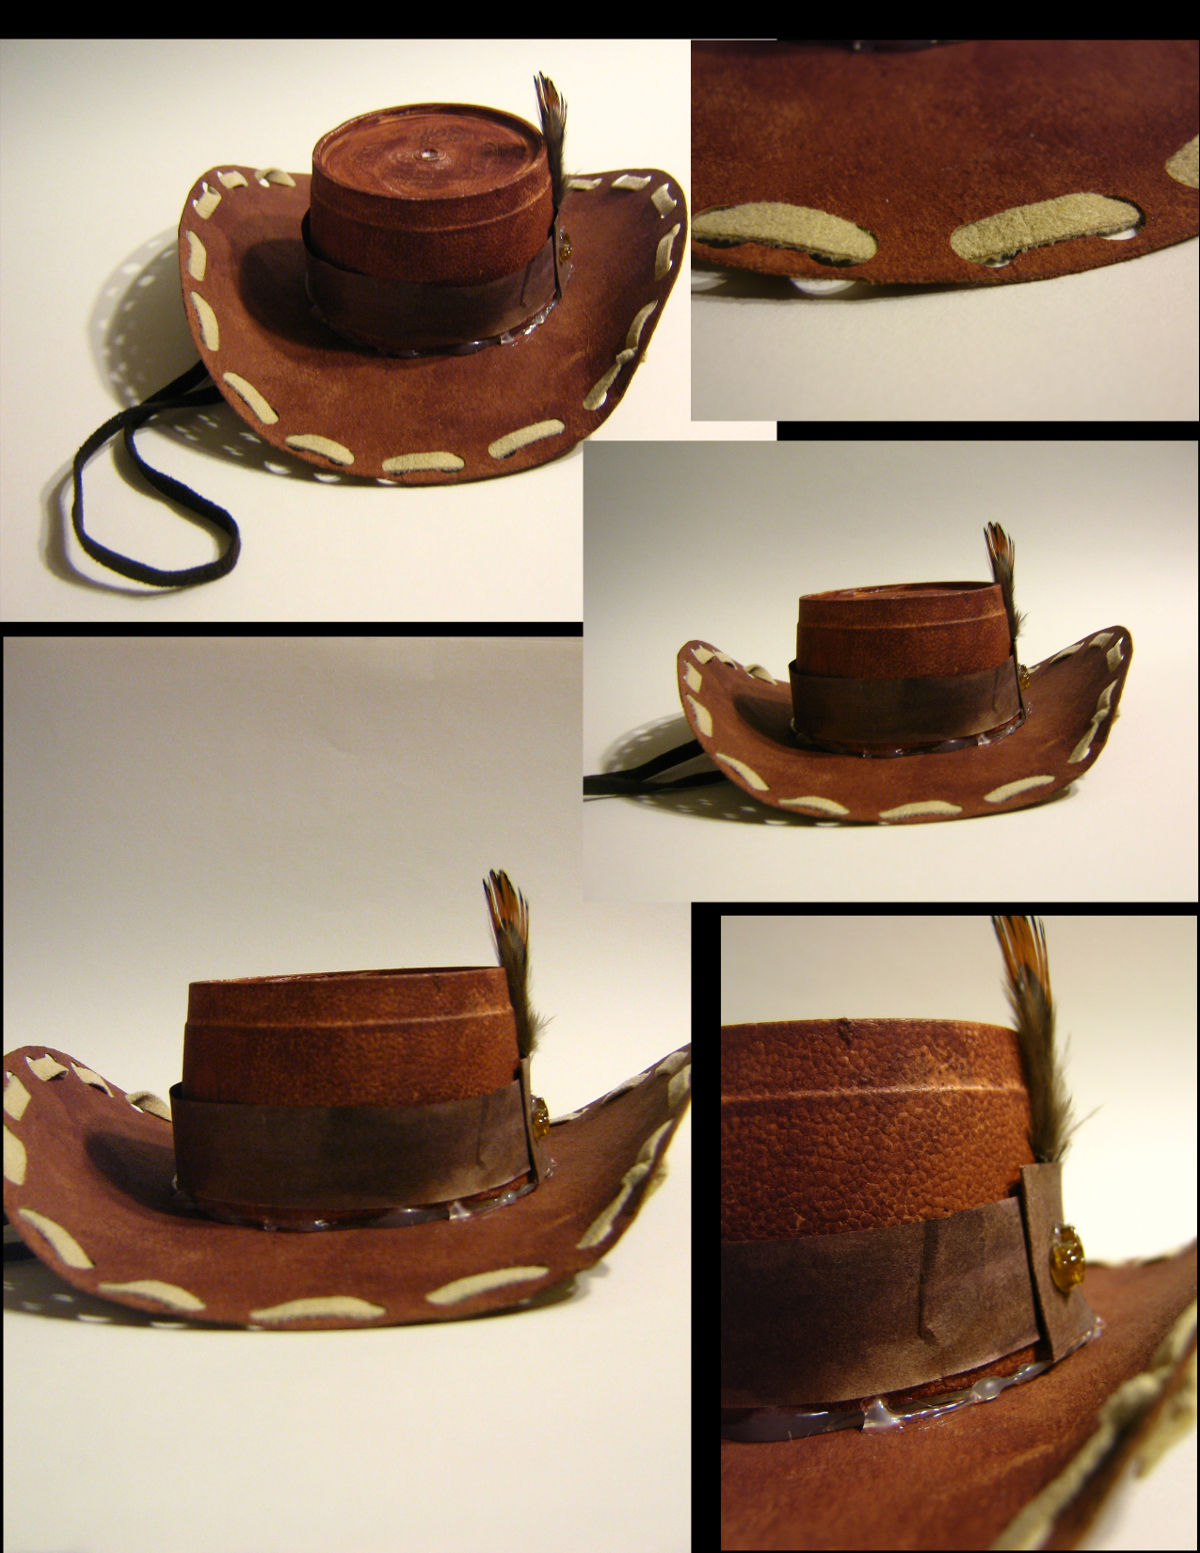
Cowboy Hat:
1. Cut the cup in half.
2. Make a circle using a compass on cardboard and then proceeded to cut it out.
3. Give both pieces a base coat of light brown paint. Then after the paint is dry add dark brown paint using a crumpled up paper towel. (this will give the hat a suede look).
4. Next glue the pieces together.
5. Color and cut out a strip of paper to glue around the upper part of the hat. After the glue was dry a feather was later added.
6. Punch holes around the brim of the hat.
7. Tread a strap into the holes. (This originally came from an old necklace.
8. To finish it off a hat strap was made using leftovers from the necklace. This was glued under the hat.
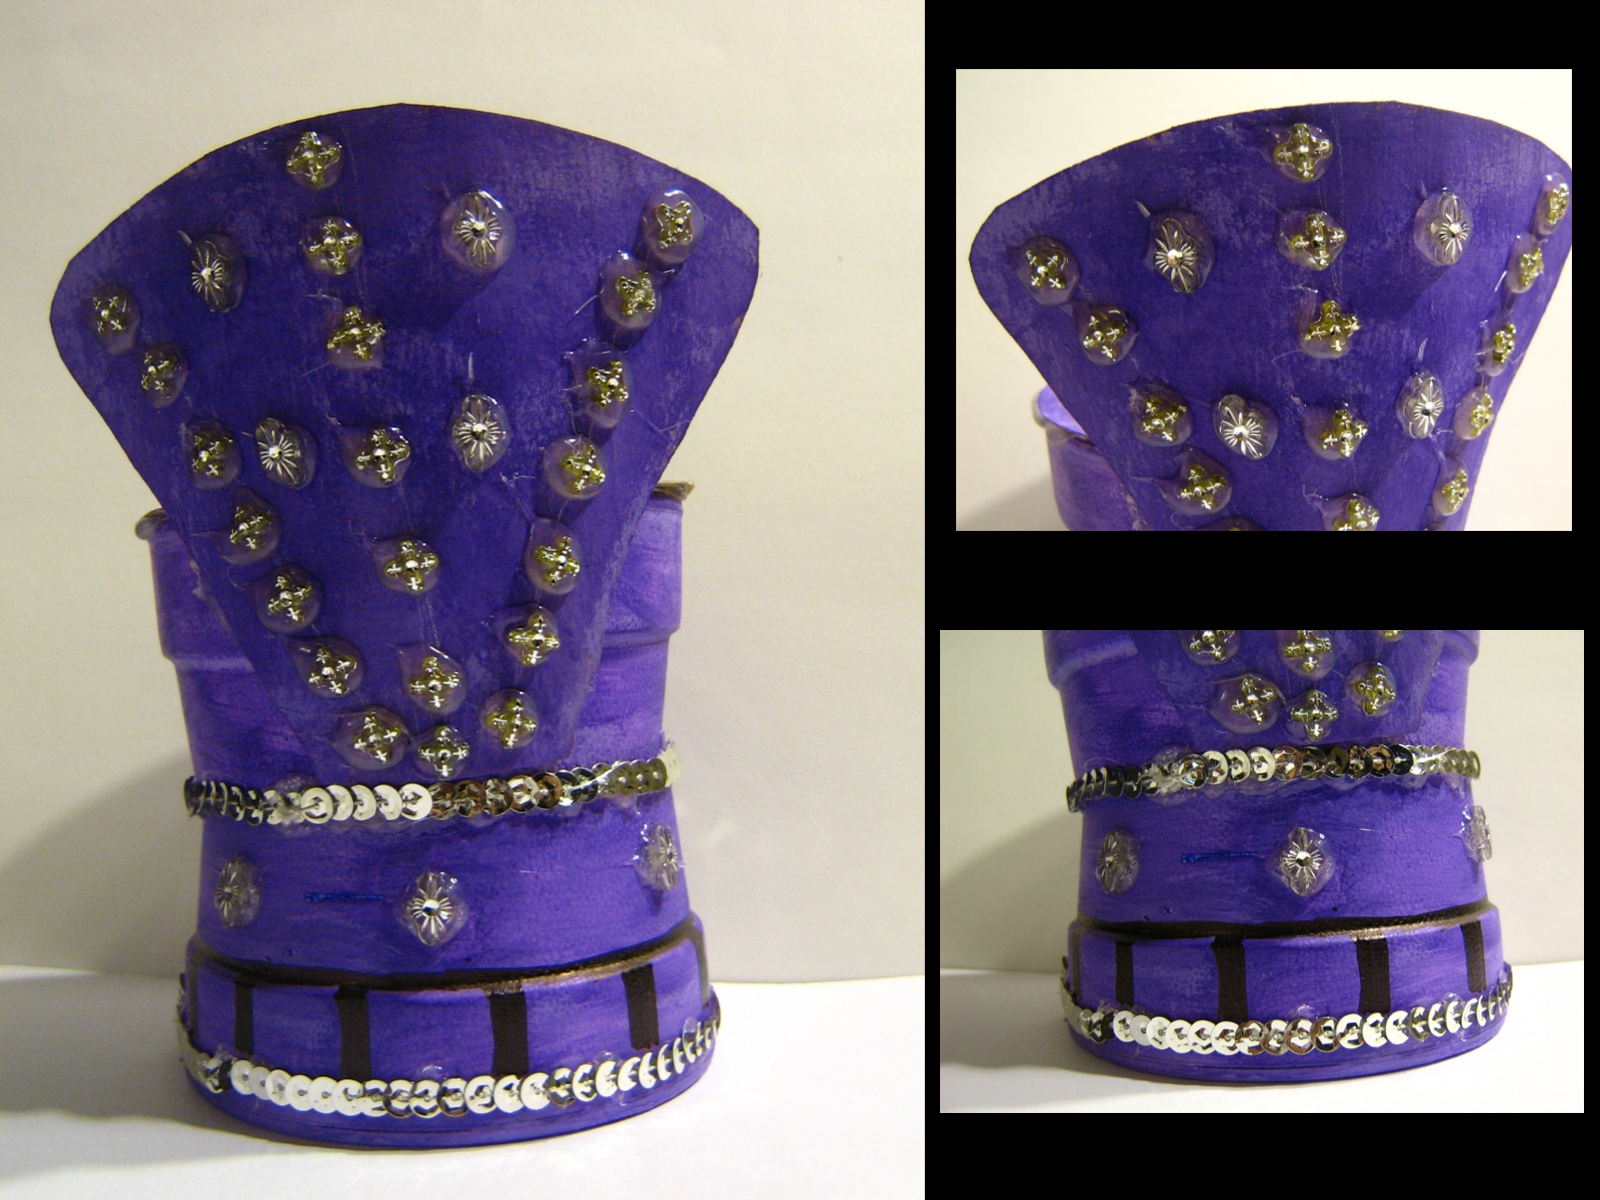
Church Hat:
1. Repeat steps 1 & 2 (Cowboy hat portion) (two cups were used)
2. Paint both cups and glue pieces together.
3. Cardboard was painted and added to the hat.
4. Fake jewelry was then glued on.
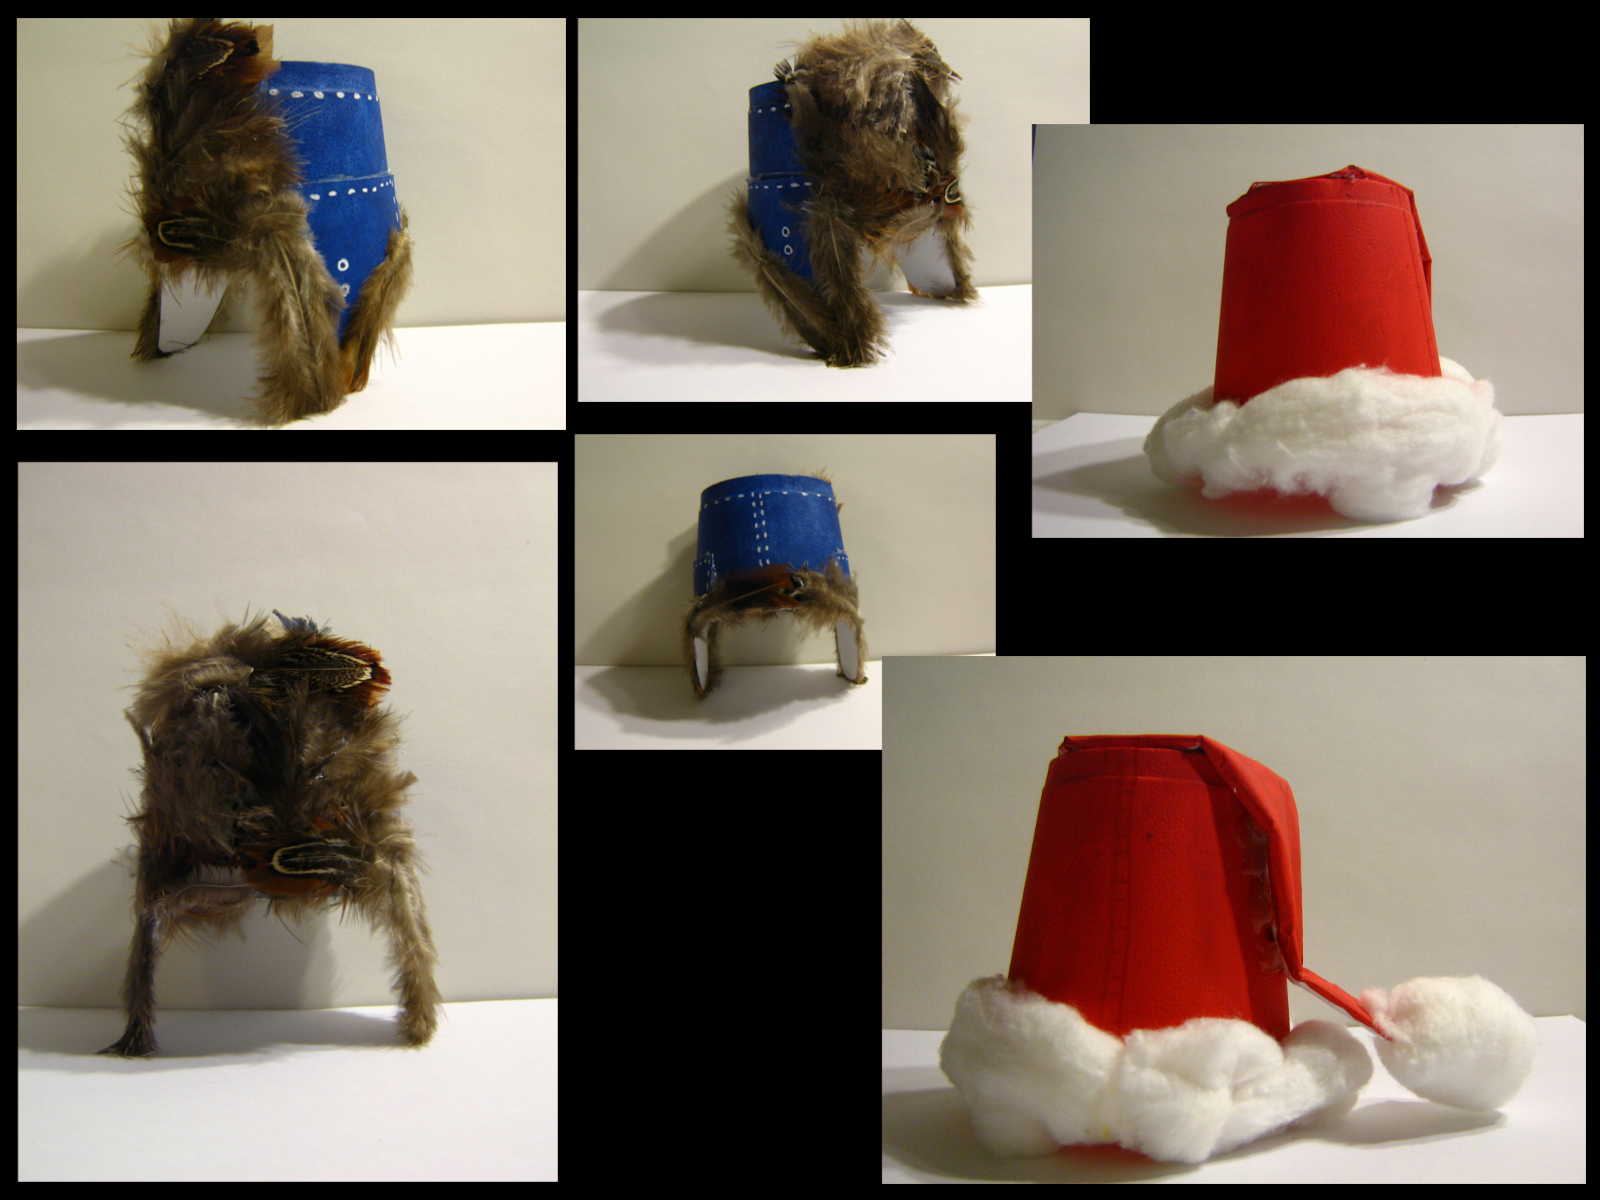
Santa Hat:
1. Paint hat (did not cut hat)
2. Folded paper was painted and glued to the top of the hat.
3. Last but not least cotton balls were added.
Winter Hat:
1. Repeat step 1. (Cowboy hat portion)
2. Cut out, paint and glue ear flaps to hat. (made from card stock paper)
3. Next add feathers
4. A white gel pen was used to give the hat extra details.
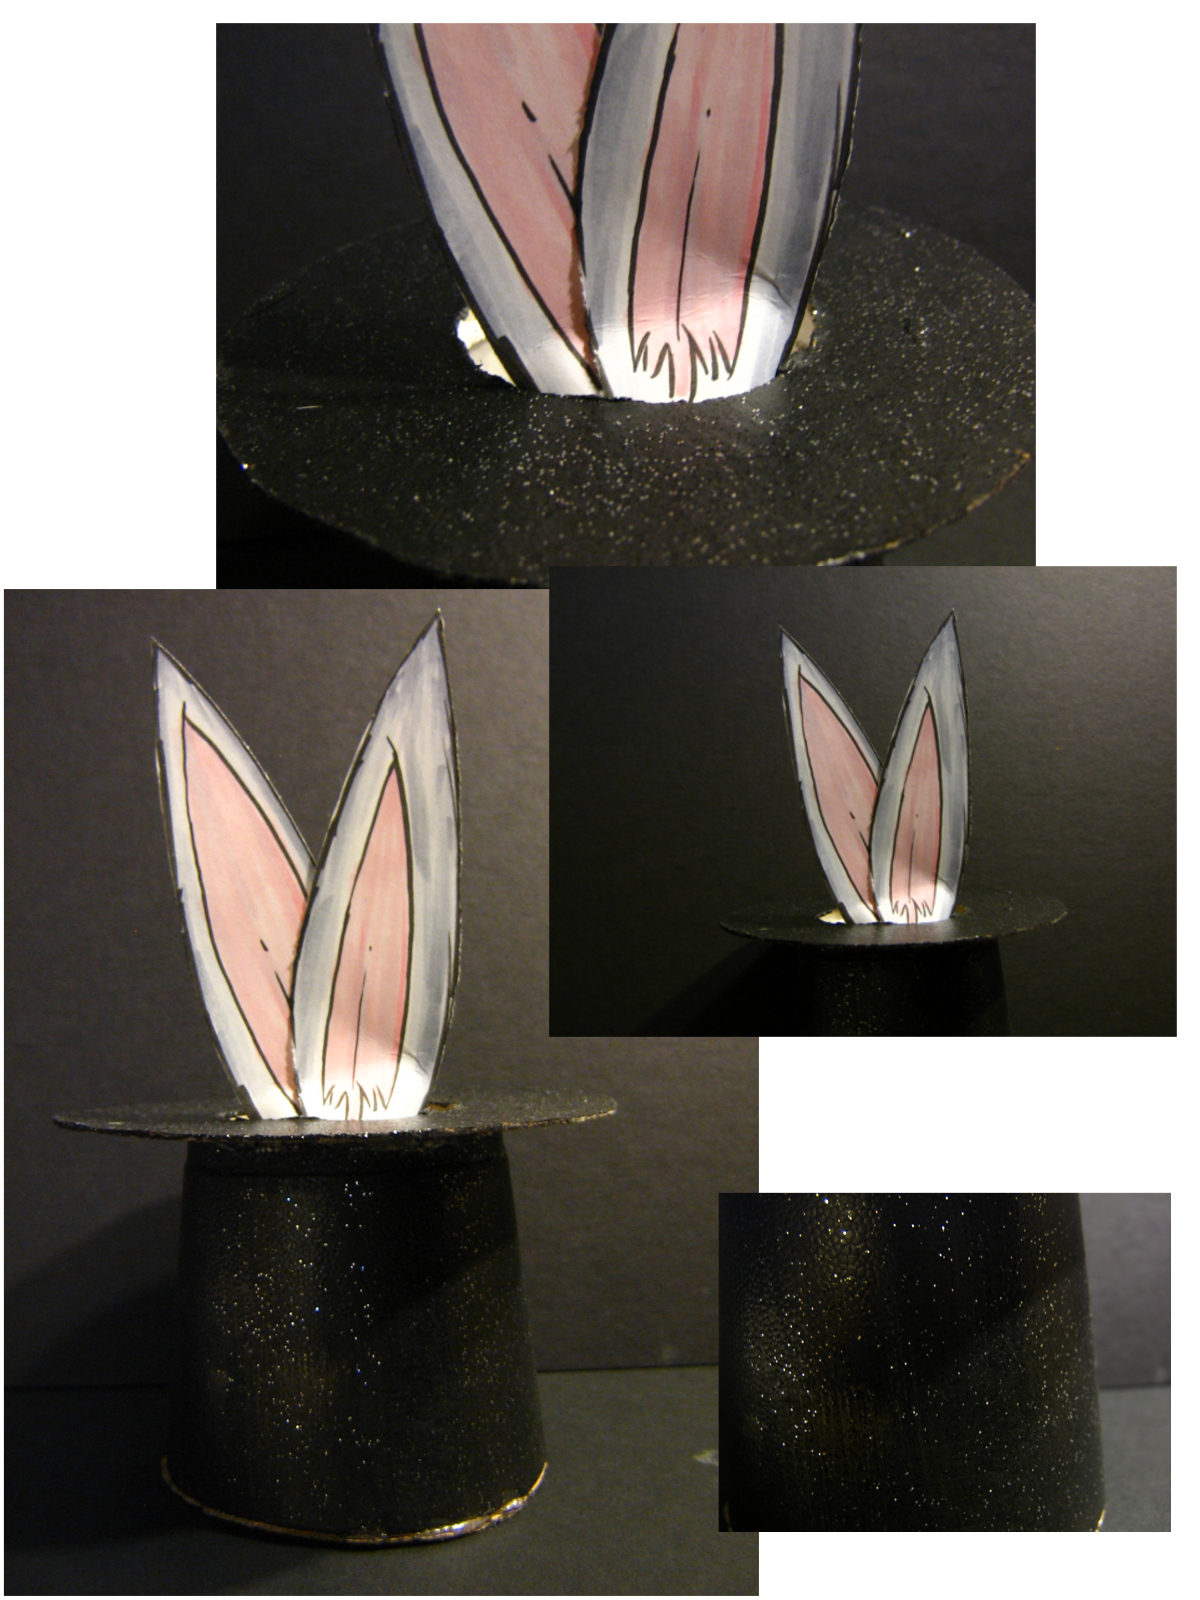
Rabbit in a Hat:
1. Repeat steps 1 & 2 (Cowboy hat portion)
2. Paint both pieces and then glue together.
3. Brush a thin layer of glitter glue onto the hat to give it a magic glow.
4. Draw, color and cut out rabbit ears. Then glue them to the inside of the hat. (ears were made from card stock paper)
This is a great project for students to test the limits of their imagination as well as their design skills. Half of the fun is trying to figure out how to get the hat to look like something you would see in a store.
THE STANDARDS
Visual Arts Standard 1: Understanding and applying media, techniques, and processes
[K-4] Students know the differences between materials, techniques, and processes
[K-4] Students use art materials and tools in a safe and responsible manner
[K-4] Students use different media, techniques, and processes to communicate ideas, experiences, and stories
[5-8] Students intentionally take advantage of the qualities and characteristics of art media, techniques, and processes to enhance communication of their experiences and ideas
[9-12 Proficient] Students apply media, techniques, and processes with sufficient skill, confidence, and sensitivity that their intentions are carried out in their artworks
[9-12 Proficient] Students conceive and create works of visual art that demonstrate an understanding of how the communication of their ideas relates to the media, techniques, and processes they use
[9-12 Advanced] Students communicate ideas regularly at a high level of effectiveness in at least one visual arts medium
THE FEATURES
Jewelry, Ink, Colored Pencil, Acrylic, Marker, Mixed Media, Paper
You must be logged in to keep, like, or comment on this resource.

Share!
Comment!